Recommended Services
Supported Scripts
If you’ve received access to your radio station on NinjaWeb, you’re just moments away from going live. This guide will walk you through your personal AzuraCast radio station setup using the easy-to-use DJ and sub-user interface. No servers, no coding—just pure radio magic.
You’ll log in directly to your own station’s dashboard, where you can upload tracks, manage playlists, broadcast live, and view now-playing data—all from one powerful control panel.
Step 1: Log In to Your Station Dashboard
Your station manager or provider (NinjaWeb) will give you a link like:
https://yourstation.ninjaweb.streamEnter your DJ or user credentials and click Log In. You’ll land on your personal dashboard for that station only.
Step 2: Review and Edit Your Station Profile
Once you log in, head to the left-hand menu and click Edit Profile under your station name.
This page lets you personalize your radio station’s identity and broadcasting details. Update the following fields:
- Name: The public name of your station (what listeners see)
- Description: A short description or tagline for your station
- Genre: e.g. rock, chill, talk radio, electronic
- Website URL: Optional – your main site or landing page
- Time Zone: Set this to your local time (e.g. Australia/Sydney) so schedule timing is correct
- URL Stub: Friendly name for your stream URLs (like
yourstation_ninja)
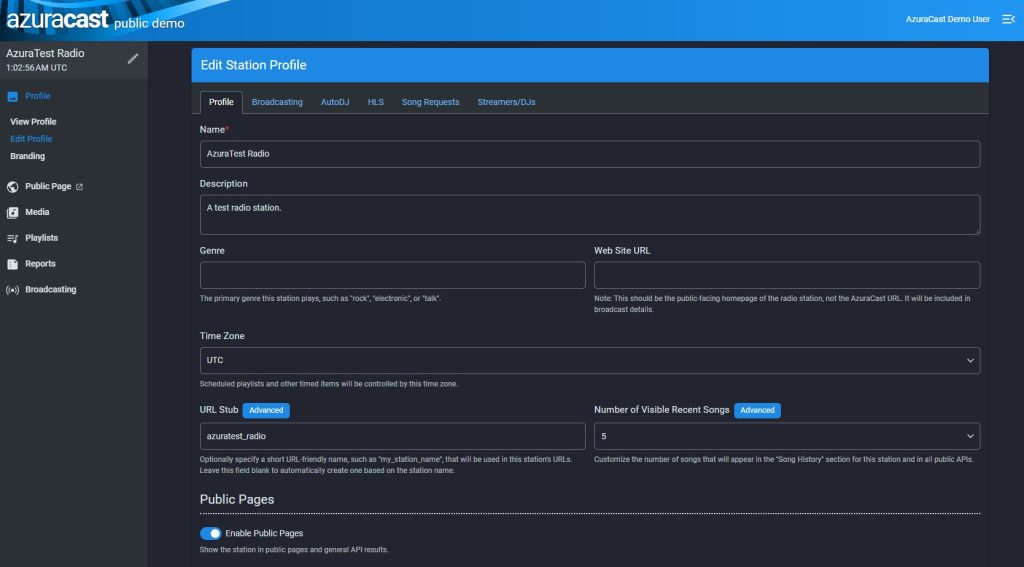
After editing your station profile, scroll down and click Save Changes.
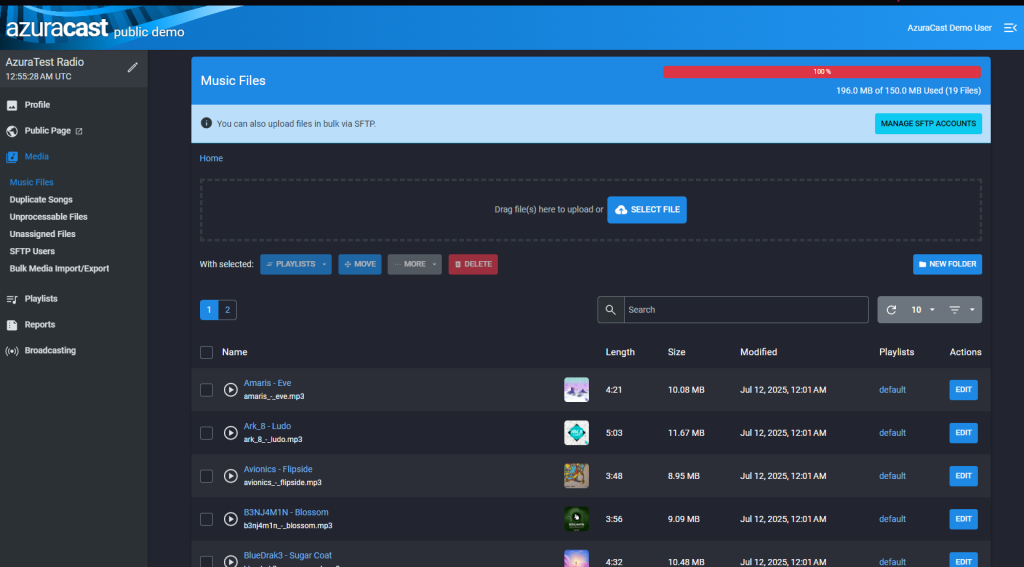
Step 3: Upload Music Files
Go to Media → Music Files. Click Upload or drag in your MP3 files. You can upload in bulk and organize tracks into folders.
Step 3: Manage or Add Playlists
Once your files are uploaded:
- Go to Playlists
- Select an existing playlist or create a new one
- Choose if it will be General Rotation (AutoDJ plays it randomly) or Scheduled
- Add tracks by selecting them under Music Files and clicking Add to Playlist
Step 4: Restart Broadcasting (If Needed)
If you’ve made changes to playlists or uploads, you may need to restart the stream:
- Go to Utilities → Restart Broadcasting
- This will activate changes instantly
Step 5: View Public Page or Share Stream Link
You can preview your station’s output in the Public Page tab. This page includes:
- Live stream player
- Now playing info
- Optional request feature
To share the stream directly, use your URL: https://yourstation.ninjaweb.stream/radio.mp3
Step 6 (Optional): Go Live with DJ Software
If you’ve been given live stream access:
- Use software like Mixxx, BUTT, or Rocket Broadcaster
- Login using your mount point (usually
/live), DJ username, and password - Once connected, AutoDJ will pause and your live stream will take over instantly
Step 7: Monitor & Manage Your Station
- Reports: Check listener stats in the Reports tab
- Now Playing: View live metadata updates
- History: See what has played recently
- Logs: Check for connection issues or stream errors
Your AzuraCast Radio Station Setup is Complete
You now have everything you need to run your station smoothly. From uploading tracks to managing playlists and going live, the AzuraCast radio station setup for DJs and users is quick, clean, and fully in your control.
Need help? Contact NinjaWeb and we’ll support you ninja-style—fast and stealthy.